|
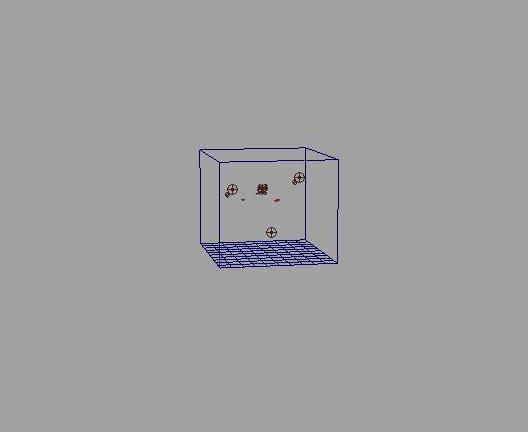
STEP 1A 3D fluid container with emitter is created and the emitter is moved to the bottom of the container.The same procedure can be repeated for 2D explosions as well. |
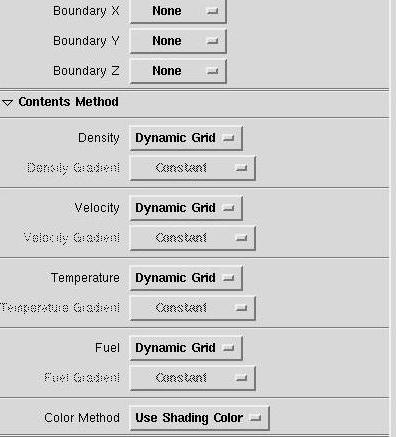 |
STEP 2First of all,the Temperature and Density are set to dynamic from off,so that we can adjust them,and the Bounding boxes are set to none. |
 |
STEP 3The gravity is decreased to a minimum value as our explosion will be moving against gravity.The viscosity is increased to give the explosion a more 'molten fluid' kind of look,and a bit of friction and damp are added.The Simulation rate is made faster . |
 |
STEP 4Some turbulence is added depending on the kind of explosion,and the light released,and Fuel scale are also adjusted according to preferences. |
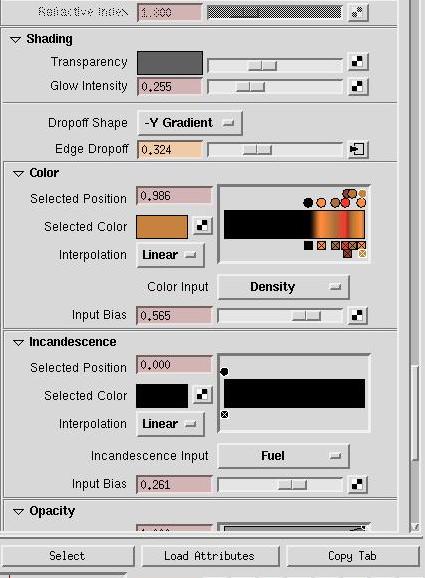 |
STEP 5The transparency is decreased to make the explosion look more solid and glow is added .The color imput is set to density so that the colors change according to the density of the explosion.The color itself is set to a ramp from black,orange to yellow.The input bias can also be adjusted to change the colors and can be keyframed to show the show in color during the explosion. |
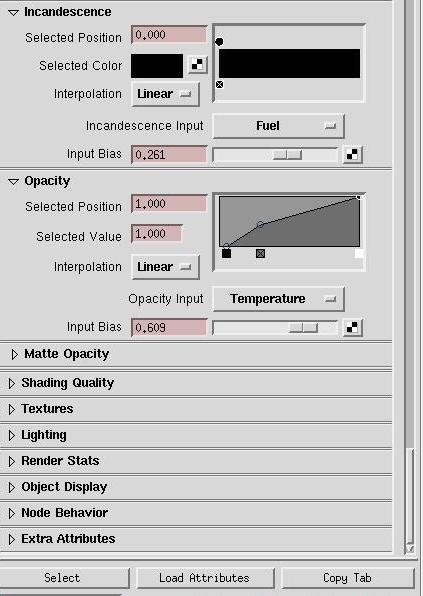 |
STEP 6The opacity is adjusted so that the black cloud around the explosion doesnt look too fuzzy and spread around.The input bias can also be adjusted to modify the amount of black cloud. |
 |
STEP 7The texture type can be set to Volume wave,Billow or Perlin noise ,-all of them look quite good.But the other two are quite slow so Perlin Noise was chosen.The texture time is set to the expression "emitter.texturetime=time" so that it varies according to the frame. |
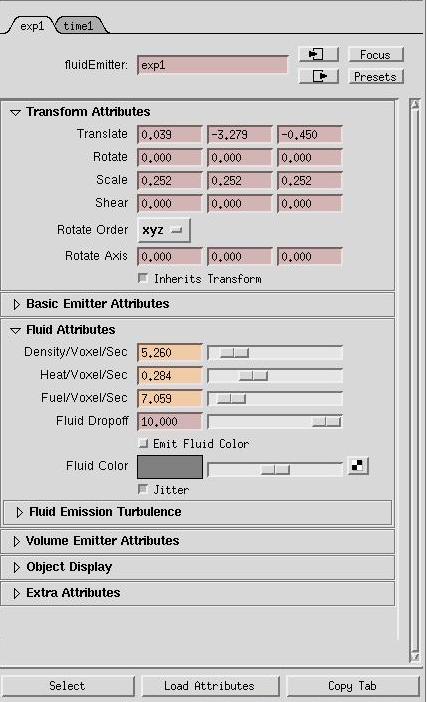 |
STEP 8First of all,the Temperature and Density are set to dynamic from off,so that we can adjust them,and the Bounding boxes are set to none. |
[
Back
]