![]()
![]()
![]()
![]()
![]()
![]()
![]()
![]()
![]()
Research Project: Object Metamorphosis and Transformations
Fani Vassiadi
MA Digital Effects
NCCA, Bournemouth University
| Introduction | The theory | The practice | My approach | Conclusion | References |
As Citroen "Transformation" is a very successful commercial I contact one of the compositors of The Embassy Visual Effects, Jon Anastasiades. I was again lucky to have an immediate reply to my email with all the information I needed and with a few more comments on the Nike "Evolution" advertisement. In order to see both videos you can enter http://theembassyvfx.com/main.html > Portfolio
Citroen “Transformation”
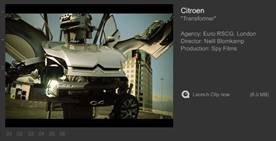
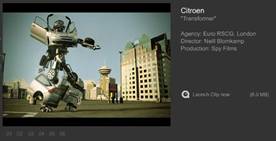
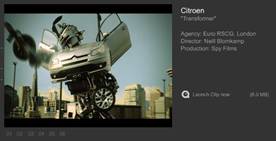
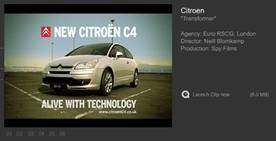
Pictures of the well-known commercial
Hello Fani,
I'll try to give you the info you
are looking for...
A transformation and a morph are different
things when it comes to vfx. A morph is a type of transformation. When something
is morphed, it fluidly changes it's shape from object A to object B Remember the
end of Michael Jackson's Black and White video with the faces changing into one
another? That's morphing. Morphing is done with software like Elastic Reality or
is included in several compositing packages like Shake, and Combustion.
here's a Morphing link with examples. Just
click on the images;
http://www.cs.utah.edu/~dejohnso/morph.html
Anyway, with that clarified, I'll try your
rather large first question. (Sorry if some of this is stuff you already know.)
We start out with detailed storyboards. These are basically a comic book drawn
to show the order of the shots in time, basic camera positioning, framing and
composition. From there an animatic is made. This is a very crude computer
generated version of the commercial. It is lo-res and 3d models are untextured
so they just appear as grey. Each shot in the storyboard is made into an
animatic shot and cut together by an editor. The animatic is shown to the ad
agency and the director and they make changes to shot timing, duration, camera
positions; basically every problem is addressed at this level as it is much
easier to work with lo-res 3d than with final full size renders. After all notes
are addressed you have a locked cut. This means any editorial changes from now
on will be very minor-everyone's committed to how the spot will look. So now the
3d artists can model final full res elements.
To build the car, a real c4 had to be scanned.
In France an actual c4 was put under a camera that converts the shape of the car
into a digital 3d mesh which is an exact replica of the real car. (here's a link
to the company who scanned for us
http://www.gentlegiantstudios.com/
) Then the real car was taken apart and scanned piece by piece to get 3d meshes
of all of the interior bits. Also any detailed work had to be built in 3d by 3d
artists. Eventually we had a complete model of the car.
Next the car had to be broken up and engineered
to "transform" so that all of the pieces fall into place and make sense
spacially. This was done in Lightwave as well and took much research to get it
to work right!
The dancing animation is done with a technique
called Motion Capture or MoCap for short. we place reflectors on a dancer's body
and while they move, a camera picks up the reflectors positions in 3d space and
translates those coordinates into data that our 3d software can read. Then this
data "skeleton" containing the dancer's movement is placed within the robot and
the robot will follow the movement exactly.
Here are some MoCap links...
http://en.wikipedia.org/wiki/Motion_capture
http://www.vicon.com/
So now you have a dancing robot. To make the
environment, which is the Vancouver skyline where we live, very large digital
photos were taken from the rooftop where the robot does his thing. All of the
photos are stitched together to form a massive panorama for the furthest
background - the sky and mountains. The midground buildings are also hi-res
photos taken from the location, but these are mapped onto simple geometry so
when the camera moves you perceive parallax. This way we had complete control
of the movement of the camera in the commercial, as the robot and the entire
environment were digital.
Next we composited the robot's many passes into
the environment. A "pass" is a layer rendered by the 3d software containing a
specific piece of the image. For example, we might get a "Specular Light Pass"
which would have only the brightest highlights in the image in it. Then the
compositors can use a pass like that to control the spec-how bright it is, if it
blooms or causes a flare, etc. There were several passes (spec, shadow, alpha,
reflection, etc...) allowing compositing to have a very high degree of control
of how the robot ended up looking. ( Compositing is the stage where you take all
the layers and put them over each other to create the illusion of something
being in an environment when it wasn't actually there. here's a link that
explains more...
http://en.wikipedia.org/wiki/Compositing
)
Of course all of these steps contain many many
more iterations within that I just don't have time to go into, but that's the
general overview.
I realize your focus is "transformation" but
there actually isn't too much more to say about that actual process - we used a
lot of reference and made sure the parts of the car logically and realistically
would fit together without colliding through one another without the appearance
of disobeying too many laws of physics when it comes to different bodies matter
occupying the same space. we used lots of reference and did a ton of R & D until
it worked.
As far as software, we used
Lightwave - 3d animation, lighting, texturing
http://www.newtek.com/products/lightwave/product/description.html
Modo - Modeling
http://www.luxology.com/modo/
Final Cut Pro - Editing
http://www.apple.com/finalcutstudio/finalcutpro/
Apple Shake - Compositing
http://www.apple.com/shake/
(that's me in the shake promo video - ha!)
Discreet Logic Combustion - Compositing
http://www4.discreet.com/combustion/
Anyway, i hope I've answered your questions!
Good Luck,
Jon Anastasiades
Nike “Evolution”
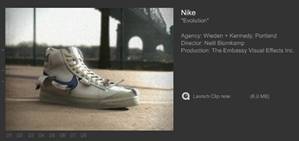

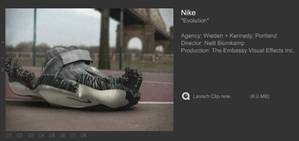
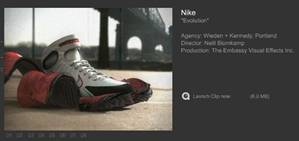
Pictures from Nike "Evolution" advertisement
The animation for the evolution of
the shoes was done in Lightwave. Again, the blooming effect isn't actually a
"morph" technically - it's actually a hand-animated effect. Every shoe had to be
scanned into data. Then this data mesh / pointcloud had to be cut up in a way to
accommodate the shoes splitting apart or growing new parts, etc. Pretty much
everything that's moving had to be had animated which is very time consuming and
took a team of 4 animators to achieve. Another technical difficulty that arises
in almost all organic looking cg work is collisions, or pass-throughs. Cg isn't
matter, so it doesn't obey any of the laws of physics when it comes to how
matter acts. Most software has some built-in physics, but none have any way of
preventing one area of a cg model being in the same place at the same time as
another area. Check out the attachment with the ultra-craptastic cg character -
in the red circle is an example of pass through or crashing - I wouldn't
actually use that image, by the way, it's just too BAD...at any rate, because
these models were so complicated, there were many times where passing through
couldn't be avoided, so the areas that were showing through other surfaces had
to be digitally painted out in Shake.
Another challenge was the sheer volume of
rendering. As you notice, there are several times-of-day flashing by showing
time-lapse. The 3d department had to render the *entire* commercial in each time
period, so we have the whole spot in morning lighting, midday lighting, etc.
This was done so the ad agency, editor and director could pick and choose what
shots they wanted at what time in the day. Also, usually you have a scene that
you only really need to light for one time period, but the lighting artist had
to re-light the scene for every time period as well! I guess what I'm trying to
say is that there was a TON of behind the scenes work and research done that
will probably never see the light of day.
Other than that, I'm not sure what more I can
tell you!
Jon
Anastasiades